Condensed Leadership Programme (CLP) Part 2

This is part 2 of a 4-part blog post. In part 1, I covered the CLP and the overall takeaway from block one. In part 2, I’ll cover blocks two to four.

Back in 2020, we finished our first CLP block, and everything is looking great thus far for the CLP. After that, however, the entire world went into lockdown. At first, I thought the CLP was over, and this great opportunity I had been given to learn about leadership and improve my leadership skills was over. But we continue, just like everything else, we went virtual on Zoom.

Block Two

Block two was all about Design Thinking. This module was a refresher for me because we have the same principles in Agile Software development.
Which are:

  • Start with the customer in mind
  • Get key stakeholders to test prototypes (UI/UX wireframes)
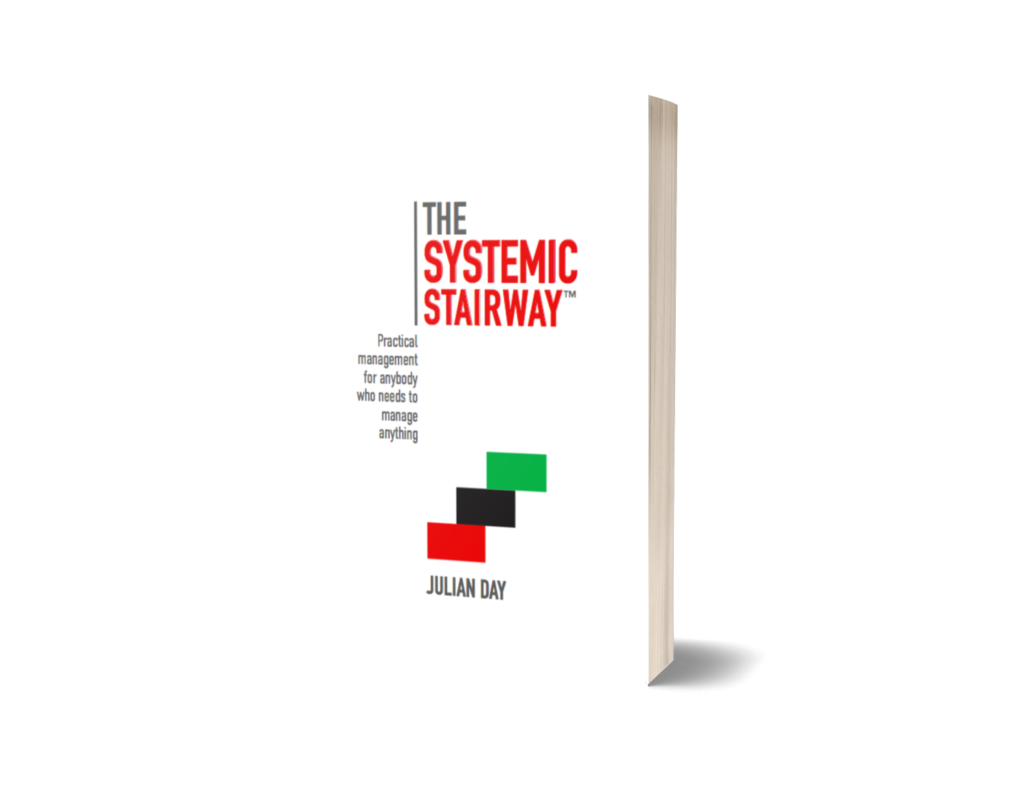
The Systemic Stairway book

Block Three

  • Analytical Thinking
  • Giving & Receiving Feedback

Many of us wished we had covered Analytical Thinking in block two instead of Design Thinking. For me, Analytical Thinking was my favourite module. Our facilitator was Julian Day, the author of The Systemic Stairway book. The Systemic Stairway is a framework for managing complex situations. The fantastic thing about the framework it may be applied to anything that needs managing. We also got the Systemic Stairway book.

Block Four

  • Facilitation Skills
  • Mastering Change

Another favourite of mine was the Facilitation Skills module. We explored the science behind highly structured meetings.

And so we powered through by doing it block by block remotely over zoom. Initially, adjusting to being fully remote wasn’t easy, and the Design Thinking module was challenging. However, we used the learnings from block two, making the rest of the blocks much more manageable.

Condensed Leadership Programme (CLP) Part 1

In my last blog post, I talked about Taming forms with React and Formik and showcasing the FormikWorkflow pattern to handle complex forms. That was some time ago, and wow, a lot has changed since then. And something different for my blog, instead of the techie article post, I am going to focus on leadership this time around. Just like everything needs Leadership, in tech, we also need Leadership.

Back in 2020, not only was I coding formik workflows, but I was also doing a Condensed Leadership Programme (CLP) at Allan Gray.

What is a CLP?

CLP is an annual programme that Allan Gray offers to selected Allan Gray staff that have been identified as future leaders for Allan Gray. Usually, talented candidates with an average of 4 to 5 years tenure at Allan Gray. The CLP is divided into five blocks, each block has 2 to 3 modules, and the programme is one year long. In addition, candidates are divided into teams, and each team has about 6 to 7 people. The CLP concludes with a project presentation from each team, and all team members get to present. All teams start working on these projects from block two onwards.

CLP kick-off venue Stellenbosch winelands

Block One

Our first block kicked off in style on a wine farm in Stellenbosch. The modules in block 1 were: 

  • Authentic Leadership,
  • Enneagram & Leadership Style
  • Ethics
  • Leading with EQ

Overall, block one focused on us as leaders and the style we would choose to lead. Also, another theme from this was “there is no right or wrong” way to lead, there is only your way, and as long as you are authentic, you will find your own unique style of Leadership. My favourite module from block one was the Enneagram module. As a toolset, the Enneagram is impressive. I was able to find answers to some of my own quirkiness regarding my Enneagram type. In addition, I gained insights into other Enneagram types.

The preceding was the first of four parts about my valuable experience & learnings from the Condensed Leadership Programme. In part 2, lockdowns happen, and it seems the CLP is over. However, it continues virtually. In part 3, I learn about coaching. And finally, part 4, my team’s project, presentation, and CLP graduation.

Taming forms with React and Formik

In my last blog post, I was talking about redux-sagas, how cool they are and why I like them. That was a year ago. A lot has changed since then. Right now, everyone’s hooked on React hooks ?, and I’m on a new team working on cool stuff.

The web app I currently work on has a lot of user interaction, mainly capturing data and going on different journeys based on different products or data they are capturing. Capturing data means forms, forms everywhere!

In general, building forms is simple, you have input fields, dropdowns & radio buttons. You have some sort of validation and submit to some API endpoint.

For simple applications (pet projects), this is easy to do. However, on large-scale applications, how do you go about building these forms? There’s probably a lot of great ways to go about doing this, however, since this my blog I want to share a way in which we solved it within our team.

To help me tell the story I will be using a time booking web app called “Time with Tom“. Tom is a popular guy and therefore everyone wants to book time with Tom. This web app allows Tom to manage all his social interaction.

  1. Users can access Tom’s schedule, and they can see when Tom is available for bookings.
  2. Then users can capture a booking request with the following:
    • date
    • time
    • an activity they want to do with Tom
    • name
    • surname
    • email

Making a booking

Time with Tom uses the following:

  • React
  • Formik
  • React-Router
  • React Material-ui

Our focus is Formik.

What is Formik?
Formik is a React package which helps you build forms in React. The Formik slogan is: Build forms in React, without the tears.
More info.

In addition, I recommend doing the simple Formik tutorial on the getting started page.

The basic design for this form would look like this:

This basic design would be okay for a pet project but on a larger-scale application, this would be difficult to scale.

When you look at this form, it may be split into the following groupings:

  • User
  • Activity
  • Booking

From these groups you may create React Components from them:

  • <User />
  • <Activity />
  • <Booking />

And if you continue to iterate over this design you can create a Formik Workflow.

What is a Formik Workflow?

Its a Factory Function that always returns an object with the following:

  • A Component function
  • A payload function
  • A validate function
  • A isActive function
  • A initialValues object literal

File: UserWorkflowFactory

import React from 'react';
import User from './component';
import payload from './payload';
import validate from './validate';
import initialValues from './initial-values';
import isActive from './active';

/**
 * User Workflow Factory
 * @param {Object} options
 * @return {Workflow}
 */
const UserWorkflowFactory = ({ ...options }) => {
  return {
    Component: () => <User />,
    payload: (values) => payload(values),
    validate: (values) => validate(values),
    isActive: (values) => isActive(values),
    initialValues,
  };
};

export default UserWorkflowFactory;

Component (Component)

The component is a React component, that houses all the Formik fields for the current workflow. Example User component with Formik fields for:

  • Name
  • Surname
  • Email

Example: <User /> Component
Note: The Component will always use FormikContext to get the values of the fields for the component. FormikContext uses React’s Context API.

Payload (payload)
The payload function extracts the workflow values from the Formik values object. This is used when submitting the Formik form.

Example: payload function
Note: The payload function will always be called with the Formik values object.

Validate (validate)
The validate function validates the current workflow values. Example if User fields are empty. The validate function will return an object with required fields errors.

Example: validate function
Note: The validate function will always be called with the Formik values object.

Is Active (isActive)

The isActive function acts as the business logic section. In this section, we may use whatever logic or data to verify whether our Formik workflow should be active. This will be used by Formik to check whether it needs to do the following for the workflow:

  • display the workflow component with its fields
  • do validation on the workflow
  • or get the mapped payload for the workflow.

Note: The isActive function will always be called with the Formik values object.

Initial Values (initialValues)

The initialValues object literal initialises the Formik form with the workflow fields. Example User fields are:

  • name
  • surname
  • email

Example: initialValues
Note: The initialValues object literal fields are used in all the workflow functions, and React component (payload, validate, Component and isActive).

Benefits of Formik Workflow:

  • Separation of concerns
  • Easy to make changes
  • Easy to tests
  • The payload function can have tests to ensure it’s producing the expected mapped payload.
  • The validate function can also have tests to ensure that the workflow validates correctly.
  • The isActive function can also have tests to ensure that the workflow business rules are correct.

Now with these Formik workflows, how would we use them? You can think of a group of Formik workflows as a feature or Formik Feature.

Time with Tom has a “Booking Request” Formik Feature, which includes the following workflows:

  • Activity Workflow
  • User Workflow
  • Booking Workflow

The BookingRequestFormik feature initialises the Formik form with these workflows.

Example BookingRequestFormik feature workflows are:
File: BookingRequestFormik

const ActivityWorkflow = ActivityWorkflowFactory({});
const UserWorkflow = UserWorkflowFactory({});
const BookingWorkflow = BookingWorkflowFactory({});

const workflows = [ActivityWorkflow, UserWorkflow, BookingWorkflow];

What makes this possible is the following Formik Workflow helpers:

  • getInitialValues function
  • validateWorkflows function
  • buildPayload function

Get Initial Values (getInitialValues)
This takes in Formik workflows array. This is an array of all the initialised Formik workflows for the feature.

It takes all initialValues for each Formik workflow and returns merged initialValues object literal for Formik.

File: getInitialValues

/**
 * get initial values from workflow and sub-worfklow for formik formik
 * @param {Workflow[]} workflows
 * @return {Object} initialValues
 */
export default function getInitialValues(workflows) {
  return workflows
    .map((workflow) => ({ ...workflow.initialValues }))
    .reduce((previousValue, initialValues) => ({
      ...previousValue,
      ...initialValues,
    }));
}

Validate Workflows (validateWorkflows)
This takes in Formik workflows array as well. For each Formik workflow, it calls each validate function with the latest Formik values. The validate function gets called by Formik during the validation.

File: validateWorkflows

/**
 * Validate workflows in parallel
 * @param {Workflow[]} workflows
 * @return {function(Object): Object}
 */
const validateWorkflows = (workflows) => async (values) => {
  const errors = await Promise.all(
    workflows
      .filter((workflow) => workflow.isActive(values))
      .map((workflow) => ({ ...workflow.validate(values) })),
  );

  return errors.reduce((previousErrors, errors) => ({
    ...previousErrors,
    ...errors,
  }));
};

export default validateWorkflows;

Build Payload (buildPayload)
This takes in Formik workflows array as well. For each Formik workflow, it calls each payload function with the latest Formik values. This is called by Formik on submit.

File: buildPayload

/**
 * Build payload for all workflows in parallel
 * @param {Workflow[]} workflows
 * @return {function(Object): Object}
 */
const buildPayload = (workflows) => async (values) => {
  const payload = await Promise.all(
    workflows
      .filter((workflow) => workflow.isActive(values))
      .map((workflow) => ({ ...workflow.payload(values) })),
  );

  return payload.reduce((previousPayload, currentPayload) => ({
    ...previousPayload,
    ...currentPayload,
  }));
};

export default buildPayload;

So when it comes together, a user can book an activity with Tom. If things stay the same then that’s it we are done and this would be the end of this post. However, as we all know in software things always change, therefore we build software to anticipate change and be able to accommodate these changes.

In Software things always change

Tom has decided that for people to book activities with him, they must pay. If you think of this from a large-scale application perspective you would have to consider the following:

  • how to add a payment Formik workflow to the existing booking request feature?
  • or do you create a new booking request feature with a payment Formik workflow as well?

Whichever method you go with, the neat thing is you know that the existing workflows (User, Activity and Booking) have been working fine. So adding the Payment Formik workflow should be as easy as adding a new component.

I’ve decided to create a payment Formik workflow and add it to the existing booking request feature. By doing this, we may also see how features may have their own business rules and how they implement those rules with Formik workflows who are not aware of these rules and simply do whatever they were built to do.

So it turns out Tom only wants to charge for some activities not all of them. This is quite easy to solve, we can just hide the Payment Formik workflow based on this business rule and show a message advising the user that the selected activity requires no payment.

Using Formik context we can retrieve the current values and using those values to validate our business rules. This is an example of the Payment Formik workflow business rule using Formik values to determine if the Payment Formik workflow is active.

File: Payment isActive

import getActivityAmount from '../../activity/util';

/**
 *
 * The isActive acts as the business logic section. In this section we may use whatever logic or data to
 * verify whether our payment-form should be active. This will be used by formik to check whether it needs to do
 * the following for the workflow:
 *  - display the workflow component with its fields
 *  - do the validation
 *  - get the payload
 *
 *  Business Rule(s):
 *  1) Only display payment for paid activities - where amount is greater 0 (all paid items)
 *  2) Do NOT collect payment for free activities - where amount is 0
 * @return {boolean}
 */
const isActive = (values) => getActivityAmount(values) > 0;

export default isActive;

Just as easy as that the booking request will now only show payment options if the activity is a paid one.

Tom is happy as we have met his requirements for only charging for these activities: Golf, Tennis, and Cycling. While Squash and Trail run activities remain free.

Making a booking final with Payment section

Conclusion
Using Formik workflows you get structured modules, which you may plug and play as you please. You may also create sub-workflows as long as you keep the same workflow signature. Are there other ways of taming forms? Please do share with me by kindly sending an email or connecting with me on Github. Thank you.

Source code: https://github.com/zulucoda/time-with-tom
Demo: https://time-with-tom.mfbproject.co.za/booking-request
A deep dive into why I use Redux-Saga

In my previous blog post, I went over my current software development tool-belt, I revealed what is in my tool-belt and why I use it. One of those packages in my tool-belt is Redux-Saga.

What is Redux-Saga?
Redux-saga is a redux middleware library, that is designed to make handling side effects in redux.

As I said before they were introduced to me by Mateusz Bosek, and he liked them. Moreover, since I began using sagas, I’ve also grown to love them and the redux-saga pattern.

React, Redux and Redux Saga.

The Redux-Saga Pattern
Redux-Saga leverages Generators, allowing us to write asynchronous code that looks synchronous, and it is easily testable – This right here is what makes redux-saga powerful, and this is why I love the redux-saga pattern.

For example, let says you have a user login process which does the following:

  • Get the username and password from state
  • Call login API endpoint with the username and password – on success get the user authorisation token
  • Save auth token in the store
  • Remove the username and password from the store
  • Call Settings API endpoint with the authorisation token – on success get the user settings
  • Set the user settings in store

This is what the saga looks like for the user login process:

In this example above I’ve used what redux-saga calls Effects, these Effects are:

  • select: Used to select state from redux store (same as getState())
  • call: Used to call other methods with arguments
  • put: Dispatches action

So my userLoginSaga is okay. However, It needs some refactoring.

So my userLoginSagaRefactor is much better. The API calls now have their own sagas. Additionally, this version is much better for unit testing. In the unit test I can test each yield, like the following:

This unit test will check each yield. The order is essential, otherwise, the test will fail. There are other forms of testing redux-saga for example redux-saga-test-plan

Conclusion
I am forever grateful to Mateusz Bosek for introducing me to redux-saga. It’s made the applications I work on better and improved my coding experience.

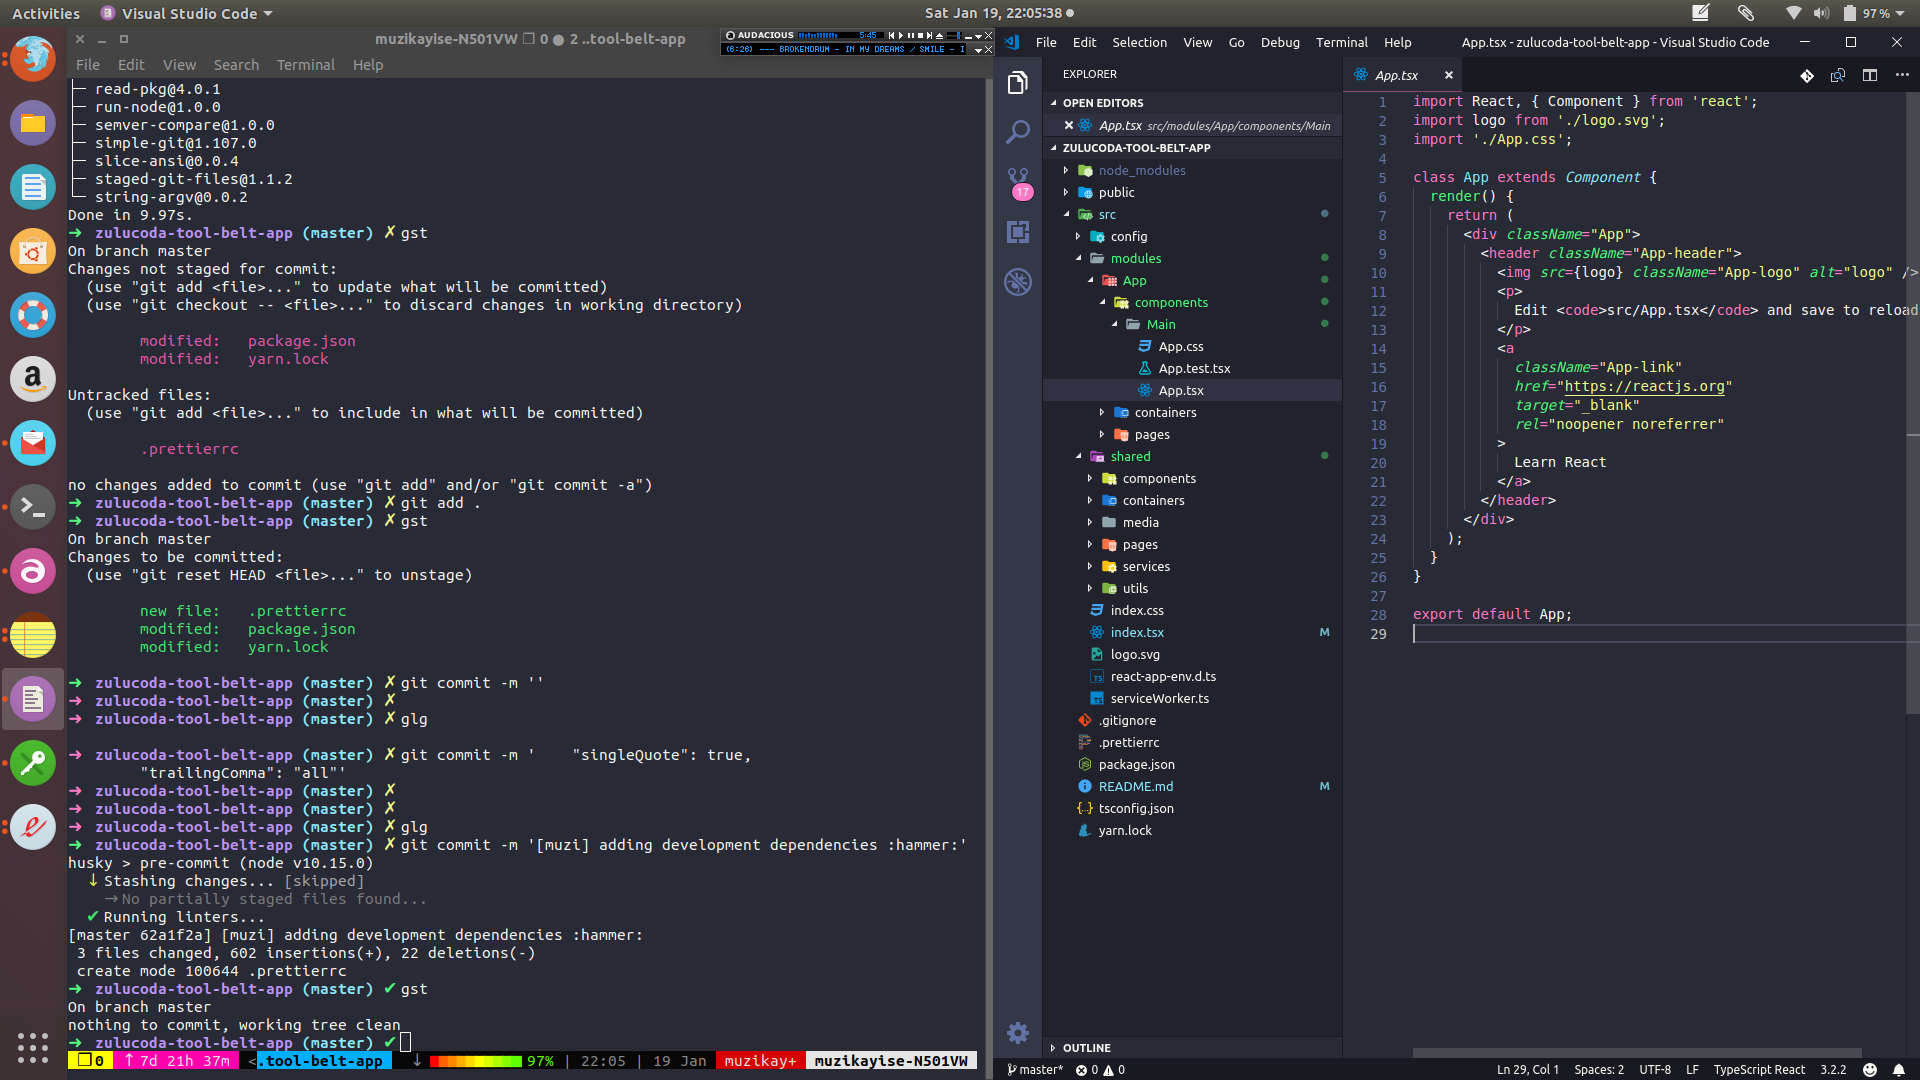
My Current Software Development Tool-belt

My Current Software Development Tool-belt / workflow (zulucoda)

I haven’t done this before where I post about what is currently in my development tool-belt. Within these last couple years of React development from 2016 to now, I’ve grown a lot, and I’ve worked with great tools, coding techniques and different patterns. You may check out this article where I explore patterns for migrating a legacy SPAs to React.

My mission with this blog post is to show you my current development tool-belt for creating a new web application:

  • What core technology do I use and why?
  • What packages do I use and why?
  • How do I structure my code and why?

Starting with the Core Technology
My coding core technology is JavaScript.
Why JavaScript?
From 2005 to 2012 I use to build web applications (monoliths) using ASP.NET. In 2013 I made the switch to start separating my Back-end from my Front-end by using AngularJs for my Front-end. This switch gave me the ability to unit test my Front-end. The Back-end became a simple REST API that could be consumed by other applications as well, example Mobile Apps. It was also far more comfortable to code Web Apps in AngularJS using JavaScript, and I was hooked on JavaScript for everything. It was around this time I also started experimenting with nodejs (However, that’s for another blog post in the future. Back to my current development tool-belt)

So fast-forward to now; JavaScript keeps getting better and better, the community keeps creating amazing open source technologies for us to use. The ECMAScript Wizards keep adding new features and keep making JavaScript great.

My web-app core technology is React.
Why React?
I’ve invested in books, front-end masters courses and many many more hours spent on blogs and tutorials. I’ve also been using it at work since 2017 till now. I know the ins and outs of React quite well, and with React you’ve got React Native as well which allows you to do mobile apps. At the moment React is my default front-end tool, and until something comes along that’s going to dethrone React as React did with Angularjs then I might consider it, but for now, its all React for me.

Okay, great so at this point, I am using JavaScript and React.
When I start a new project, I use create-react-app.

create-react-app is a React boilerplate for more info go to https://github.com/facebook/create-react-app

$ npx create-react-app zulucoda-tool-belt-app --typescript

Why I use create-react-app?
I use it for everything. When I need to create a prototype to verify a package or feature quickly. By default it has all the basics you need:

Now that I have my core and project created, What packages do I use and why?

I am separating these into production dependencies (packages needed by the web-app to run in production) and development dependencies (excellent packages which make my development workflow superb)

Production Dependencies
Redux for State Management – https://github.com/reduxjs/redux & https://github.com/reduxjs/react-redux
Why Redux?
Once you understand the Redux architecture you, always want to create an application using this architecture. more info, please see how I use redux on migrating a legacy SPA.

$ yarn add redux react-redux

Redux-Sagas for Side Effects/Middleware – https://github.com/redux-saga/redux-saga
Why Redux-Sagas?
I use to use Redux-Thunk for Redux side effects/middleware. However, a while back a colleague of mine Mateusz Bosek introduced me to Redux-Sagas, and the Redux-Sagas pattern is terrific. Check out this article where I used sagas for migrating a legacy SPA to React.

$ yarn add redux-saga

React-Intl for Internationalising – https://github.com/yahoo/react-intl
Why React-Intl?
Before moving to Dubai, UAE. This package would not be on the list because all applications I worked on in South Africa only supported the English language, therefore, there was no need for React-Intl. However, this was just a lazy design because what if we did want to support an additional language we would have to refactor the entire application. So right now any application I work with has React-Intl by default even if only one language is used, at the start. If I need to add additional language support, the application is ready to support that.

$ yarn add react-intl

Material-ui for UI (Layout, Theme and Styling Components) – https://github.com/mui-org/material-ui
Why Material-ui?
There’s a massive community behind this open source project. React components that implement Google’s Material Design.

$ yarn add @material-ui/core

Development Dependencies
Because I used create-react-app to set up my React development. I already have the following:

  • Jest – for unit testing. I update my package.json file by setting the unit test code coverage.
  • Typescript – for type checking (In 2019 you must add types to your code.)

Update package.json

"jest": {
    "coverageThreshold": {
      "global": {
        "branches": 100,
        "functions": 100,
        "lines": 100,
        "statements": 100
      }
   }
}

Other development dependencies that help me with my development workflow:

Enzyme – https://github.com/airbnb/enzyme
why Enzyme?
I use it for unit testing React components (the view). I test things like button clicks, trigger onChange events, etc… I aim to have to have 100% test coverage in my React applications. See this blog post on unit testing in React.

$ yarn add -D enzyme enzyme-adapter-react-16

Prettier – for code format. https://github.com/prettier/prettier
Why Prettier?
No one has time to format their code :D, therefore, let prettier format your code for you. Decide your format rules upfront and let prettier do all the work. I configure prettier with husky and lint-staged to automatically format every file I commit. Therefore all code committed to GitHub is formatted automatically by prettier.

$ yarn add -D prettier husky lint-staged

Setup in package.json file

  "lint-staged": {
    "*.{js,jsx,ts,tsx}": [
      "node_modules/.bin/prettier  --config .prettierrc --write",
      "git add"
    ]
  },
  "husky": {
    "hooks": {
      "pre-commit": "lint-staged"
    }
}

Create .prettierrc file

{
    "singleQuote": true,
    "trailingComma": "all"
}

Okay, so now that I covered my core, and my main production and development packages. Next on the list is the coding structure.
With this fantastic React development environment set up with these main packages, and unit test coverage setup. All is useless if the coding structure is not modular or lacks a good structure that can scale.

Folder structure

zulucoda-folder-structure

config folder
This is where I set up my root reducers, sagas, etc.

zulucoda-config-structure

modules folder
The modules folder is where I create my features for my web-app. Each feature has a components, containers and pages folder. Regarding nesting, before I’ve had a situation where I went crazy with nesting components inside components, this resulted in a complex nesting and over time the structure became difficult to work use. So the rule I use now, is I don’t go past 1 level of nesting. This means in the parent components is on the same level as children components. At first, this seems weird over time, and I got used to it. The same rule applies to containers and pages.

zulucoda-modules-structure

shared folder
In the shared folder, I place all items which are common or used in multiple places. This also where I place the API interface as well. The same nesting rules apply for shared folder structure.

zulucoda-shared-structure

Summary
Currently, this is I what use and its working for me. However, this is not cast in stone; it’s like an evolving style guide. Additionally, the packages and patterns that I am using are working for me right now, once again when I come across a package or patterns which works better or easier, I evaluate it, try it out and then it gets added to my tool-belt.
Repo: https://github.com/zulucoda/zulucoda-tool-belt-app

Yet Another Reason Why You Should Migrate Your Current (Legacy) SPA to React

Hybrid app solution simple overview

So with this post, I am trying something different. I am just going to tell you about my experience thus far with taking an existing SPA created in Backbone + jQuery and migrating this SPA to React.

I am going to get straight into it, and therefore if you’re new to React, my suggestion would be to check out other blog posts as this will cover advanced topics.

Additionally, I know that many people have written articles & posted videos on such migration. However, when I was reading and watching those videos, I was still missing critical architectural info. So even though sample code and blog post example were made available to me, this still didn’t help me in what I needed to do.

Migration Planning Phase
After doing research, I presented a few ideas to my colleagues and Head of Development. There where two main ways of going about our migration:

  • Hybrid Solution
  • Complete Clean Refactor

Hybrid Solution
This would allow us to slowly migrate sections of our existing Legacy SPA over to React one feature at a time. The ability for React to run side by side with other JavaScript libraries/frameworks is a significant feature. This is something I completely missed, even though Facebook have always stressed this point about React’s abilities (more on this later).

Complete Clean Refactor
We start from the ground up and re-build everything. There’s a point in the life of a product where a complete clean refactor is not feasible. When you have a product that is successful and clients are happy. Yes, the underlying tech might be outdated, it might take longer to deliver new features and maybe its no-longer developer friendly.
Additionally, asking business just for a budget to refactor an existing product? It’s no wonder why business does not trust its tech people.

After presenting this information to the team, the Hybrid Solution was a clear winner.

Before joining the team, I had been working on a React SPA that used a NodeJs + Express API. I was working on both of these code bases. Additionally, we had a React Native application using the same API. Moreover, before that, I was working on an Angularjs (1.5) App. Therefore I had no Backbone experience. However, this would not be an issue.

So we had an idea that we should do a hybrid solution, but we didn’t know how we would do it? Therefore it was suggested that we start by prototyping this hybrid solution.

The Prototype Phase
This phase would last two weeks, and we would use the learning’s from this phase to create an architectural solution, which we will use going forward for our smooth react migration.

During this prototype phase, I tried many solutions to get React working side by side with the Legacy SPA. Going back to the statement above about React being able to run side by side with other JavaScript libraries, I completely missed this in the first week of prototyping. I had created a complex solution evolving an iframe which would run the React app in the iframe. Then I had built this custom middleware which would hide and show the iframe when navigating too and from the Legacy SPA App to the React App. At first, this was a neat solution. It looked great and worked well.

When I presented my solution to my colleagues, they were happy with the outcome. However, they challenged me to simplify the architecture and use Redux Architecture with Redux-Saga as middleware and making use of Redux-Saga side effects for rendering components onto the DOM. This would get rid of the iframe and simplify the middleware to dispatch actions to redux and sagas and make use of Backbone events. This way any new developer joining the project would not need to learn my custom middleware but use existing tech knowledge they know about Redux and Backbone.

The Final Architecture
I cannot post the actual code as that is company property. However, the beauty of these patterns I used during the prototype phase are so simple and straightforward that I have recreated them for this blog post.

Hybrid app solution detail view

React App

  • Redux
  • React-Redux
  • Redux-Sagas

Legacy SPA App

  • jQuery
  • Some JavaScript Library
  • React-Middleware – used for dispatching actions

So the Legacy SPA does not have a clue about React it just continues to run as it does currently. We have a React-middleware which dispatches actions from the Legacy SPA to Redux or Sagas.

Storing User Info in Redux
So example currently on our SPA when a User logs in, after login, the react-middleware dispatches an action with User login payload, this is sent to Redux and the User data is stored in our Redux store for use for by our React App.

Rendering/Mount React Component
This is probably one of the coolest things I learnt about React which is the possibility of rendering multiple components onto the DOM. Now I didn’t know React could do this. However, I recently learnt from a conference talk that this is how they use React at Facebook.

In our SPA we decided to use redux-sagas side-effects to also render components onto the DOM for us. Therefore, on the Legacy SPA, an action is dispatched with a DOM element ID. Then a saga listening to this action uses that element ID to render a component onto that DOM element using ReactDOM.render(). The great thing about this is we are respecting the Redux Architecture, by simple dispatching an action, this easy to understand even for new people joining our team.

Rendering/mount react component using sagas side effects pattern

Un-Rendering/Dismount React Component

un-rendering/dismount react component using sagas side effects pattern

Where are we now
We have just finished our first feature in React, and it is working great inside the Legacy SPA. We are about to start creating more new features using React rapidly. We will also start looking at converting existing functionality over to React. The remarkable thing about this Hybrid solution, is we are keeping business happy by delivering the features they want. We as developers have created a great developer experience for ourselves.

So you want to know what you should test when using React?

So you have been using React now for some time, and you want to know what you have to test, and If you have seen one of Brian Holt’s videos on FrontEndMaster on Introduction React and Redux. In this video, Brian says that at Netflix they do not have unit tests for their React components because they change so often. The problem with this statement is a new guy, or an inexperienced team might take this out context to say that if Netflix does not write unit tests for their React components why should we. My problem with this is these people can use this as an excuse. Also, we have to look at the capabilities here, Brian Holt is a super talented developer, and at Netflix, He is surrounded by the best of the best, so for them, it works because they are operating on another level (rockstar level lol ??).

I come from Angular 1.5 where it was straightforward what needed to be unit tested. We wrote unit tests for controllers, components, services, directives and custom modules. The view was tested with e2e tests using protractor plus. With these you could get very impressive test coverage, one project I worked on we had 100% test code coverage. However, that was Angular 1.5 days, and we have since moved on from that to React. Like I had with Angular 1.5, I want all my React applications to have excellent test coverage.

With all the React applications I have built thus far I have focused a lot on testing, and within each app, I have been tinkering with different approaches. Moreover, I think I have found a good approach which works well for most applications including enterprise.

3 Step RCV (Redux, Container, View) Testing Approach

To demonstrate this RCV testing approach, I will be using my react-tunes-player repo. Also, for Redux I use the ducks modular pattern.

Step 1: Test Redux (RCV)

  • Redux: Test all your reducers and actions. In fact, my suggestion would be to use TDD (Test Driven Development) for this. Testing your reducers and actions has nothing to do with React, at this stage. If you are coming from Angular 1.5, you can think of this as testing some custom modules which had nothing to with Angular.
  • Note: If you are building a React application my suggestion is always to use Redux for State management. React + Redux are made for each other.

Testing an action & reducer
Note: This test below is making sure that when the setTunes() action is dispatched to the reducer, the expected state should have the tunes array set with the tunes received from setTunes().

View on GitHub: react-tunes-player-reducer.spec.js

//file-name: react-tunes-player-reducer.spec.js

  describe("set tunes", () => {
    it("should return state with tunes set when setTunes action is dispatched", function() {
      const action = setTunes(tunes());

      const actual = ReactTunesPlayerReducer(stateBefore(), action);

      const expected = {
        ...stateBefore(),
        tunes: [...tunes()]
      };

      expect(actual).toEqual(expected);
    });
});

Step 2: Test the Container (RCV)

  • Test your container. You should still use TDD (Test Driven Development) for this. Here you are testing your connected component, basically testing the glue between Redux and Your React Component. The key functions are mapStateToProps and mapDispatchToProps.

Testing mapStateToProps
Note: These tests below make sure that we have mapped state with the props we want to pass down into our view.

View on GitHub: react-tunes-player-container.spec.js

//file-name: react-tunes-player-container.spec.js
it("should mapStateToProp tunes to _tunes", function() {
    expect(wrapper.node.props._tunes).toEqual(
      initialState.reactTunesPlayerReducer.tunes
    );
  });

  it("should mapStateToProp current to _current", function() {
    expect(wrapper.node.props._current).toEqual(
      initialState.reactTunesPlayerReducer.current
    );
  });

  it("should mapStateToProp player to _player", function() {
    expect(wrapper.node.props._player).toEqual(
      initialState.reactTunesPlayerReducer.player
    );
});

Testing mapDispatchToProps
Note: These tests below make sure that we have mapped our actions to the props we want to pass down into our view.

View on GitHub: react-tunes-player-container.spec.js

//file-name: react-tunes-player-container.spec.js

it("should mapDispatchToProps setTunes", function() {
    expect(wrapper.node.props.setNextTune()).toEqual(setNextTune());
  });

  it("should mapDispatchToProps setPreviousTune", function() {
    expect(wrapper.node.props.setPreviousTune()).toEqual(setPreviousTune());
  });

  it("should mapDispatchToProps setTunes", function() {
    expect(wrapper.node.props.setTunes()).toEqual(setTunes());
  });

  it("should mapDispatchToProps setCurrentTune", function() {
    expect(wrapper.node.props.setCurrentTune()).toEqual(setCurrentTune());
  });

  it("should mapDispatchToProps playCurrentTune", function() {
    expect(wrapper.node.props.playCurrentTune()).toEqual(playCurrentTune());
  });

  it("should mapDispatchToProps pauseCurrentTune", function() {
    expect(wrapper.node.props.pauseCurrentTune()).toEqual(pauseCurrentTune());
});

Step 3: Testing the View (RCV)
Test your view. This is the controversial part which guys like Brian Holt and many others have said not to waste your time testing this is because the view always changes. My suggestion is the following:

  • Newbie – New to React: Test everything in your view
  • Inexperienced Team – New to React: Test everything in your view
  • Everyone else: Depending what your component does:
    • Test all component methods like componentDidMount, componentWillReceiveProps and etc..
    • If your component renders differently according to state, test those different render states

Testing different render states, plus componentDidMount and componentWillReceiveProps

View on GitHub: react-tunes-player-view.spec.js

//file-name: react-tunes-player-view.spec.js

describe("when not rendered with tunes", () => {
    beforeEach(function() {
      wrapper = shallow();
    });

    it("should render React Tune Player View with warning message displayed", function() {
      expect(wrapper.contains("Warning! No tunes loaded in player.")).toBe(
        true
      );
    });

    describe("componentDidMount", () => {
      it("should NOT add event listener when tunes props is supplied", function() {
        spyOn(
          ReactTunesPlayerView.prototype,
          "componentDidMount"
        ).and.callThrough();

        wrapper = mount();

        expect(
          ReactTunesPlayerView.prototype.componentDidMount
        ).toHaveBeenCalledTimes(1);
        expect(wrapper.find(".warning-wrapper").length).toEqual(1);
      });
    });

    describe("componentWillReceiveProps", () => {
      it("should NOT call playCurrentTune when isPlaying is true", function() {
        wrapper = mount(

        );

        wrapper
          .instance()
          .componentWillReceiveProps({ _player: { isPlaying: true } });
        expect(playCurrentTuneMockFunc).toHaveBeenCalledTimes(0);
      });

      it("should NOT call pauseCurrentTuneMockFunc when isPlaying is false", function() {
        wrapper = mount(

        );

        wrapper
          .instance()
          .componentWillReceiveProps({ _player: { isPlaying: false } });
        expect(pauseCurrentTuneMockFunc).toHaveBeenCalledTimes(0);
      });
    });
});

So if you are a Newbie or Inexperienced Team just test everything you will learn a lot about react, redux, enzyme, jest, shallow rendering and jsdom. However if you are NOT going to write tests for your view, the minimum you may check is if the React component still renders after making changes, and this can be done with enzyme using shallow rendering.

Minimum view tests – check if component renders without crashing

import React from 'react';
import { shallow } from 'enzyme';
import App from './App';

it('renders without crashing', () => {
  shallow(<App />);
});

Just like you, I am also always learning and getting better, so the above is my take at this moment in time. I will continue to tweak, experiment and improve. If there’s anything that you come across or a better method, please will you kindly share it? I am open to improvements.

@Brian Holt, thanks man for everything, it is because of you that I know React and Redux, thank you 🙂
Also shout-out to FrontEndMaster,
Also shout-out Anthony Accomazzo, Ari Lerner, Clay Allsopp, David Guttman, Tyler McGinnis, and Nate Murray these are guys that wrote Full Stack React.
Also shout-out to the creators of these excellent tools we use react, redux, enzyme, jest, create-react-app and many more.
Also shout-out to the guys that have written articles on testing React:

Alfa Romeo Reliability Myth Has Been BUSTED!

This is a photo of my Alfa Romeo Giulietta Quadrifoglio (QV), I bought this car brand new in June 2011. It had zero kilometres on the clock, plus I was and will always be the single owner. My Alfa Romeo Giulietta Quadrifoglio (QV) has just reached 200 000KM on the clock. Furthermore, it will be my QV’s 8th birthday. You might look at kilometres driven and remark at how many kilometres I have raked up in 8 years, moreover they were eight incredible years of driving. Every opportunity I got to drive, I did. I have been all over the Gauteng province, including to KwaZulu Natal the land of my Zulu people. What I love about my Alfa Romeo Giulietta Quadrifoglio is that every kilometre that has been driven has always been exciting there has never been a dull moment or a time when I had enough.

My Alfa Romeo Giulietta Quadrifoglio

My Alfa Romeo Giulietta Quadrifoglio (QV) still surprises me with every acceleration. Moreover, the handling has always been exciting. I am not sure what the Italians do when they create these fantastic sports cars. You can feel the passion and love that has been transferred to all their sports cars. This is my 1st Alfa Romeo, and I love it.

Before my Alfa Romeo, I had an Audi A4 B8 2TDi the car was good, well built, plus had an excellent sound system. After three years with it, I had enough. I was looking for something else, I was ready for another car. When I had the Audi, there was not much excitement after one year of owning it. The novelty had worn off. There are only two things I missed about the Audi, the sound system and after-sales service received after buying the car. One other thing which was unique about Audi South Africa was they sent me a gift after purchasing my Audi. I’m not sure about other countries, but I think this is where Alfa Romeo South Africa can learn a thing or two about after-sales service from other luxury brands. Or though I don’t want to dive too deep into this, also let me make it clear, I’m referring to the craftsmanship regarding servicing their cars, and I am relating to my experience on how well they managed the perception and their communication with their clients. Don’t get me wrong Audi’s are not perfect, they do break. Also, they’re after-sales people also do make mistakes. I can account two experiences that I had which backs this statement up:

  1. My Audi service representative told me that my Audi had break sensors; therefore, it will indicate to me when the breaks needed changing; however, this was not case plus this ended up damaging the brake disks.
  2. My Audi broke down in traffic, luckily I was still able to drive.
    However, these two experiences above were managed very well by Audi when the car was booked in for service.

Anyway, I digress from the topic, coming to back to the primary subject which is my Alfa Romeo Giulietta QV has made it to 200 000KM, therefore crushing the fears of “reliability”. Everyone who knew I had an Alfa Romeo, would congratulate me on my Italian car, then crack some clever joke like “at least your car will look pretty on the side of the road after it breaks down”. Now you can imagine the confidence this gave me in the start, knowing that someday I might be stuck on the side of the road with a broken car. At first, I brushed it off by saying it’s okay it’s still under warranty therefore if I do get stuck, the warranty will cover it. Moreover, do remember that this is my first Alfa Romeo. So it’s like these people (Alfa Romeo haters) were saying I’d never make it past 100 000KM. The fact that I have made it to 200 000KM proves to me that Alfa Romeo Reliability myth has been BUSTED.

My Alfa Romeo Giulietta Quadrifoglio

To summarise, this is my first Alfa Romeo that I have owned. Moreover, I have been pleased with what my Alfa Romeo has been able to achieve. Yes, there were ups and downs, however, I can call recall more fantastic moments though. Every morning I am greeted with this beautiful car. Furthermore, it is at that moment I know I am about to have fun driving to work. Bellissimo, Forza Alfa Romeo.

Technical Details:
Name: Alfa Romeo Giulietta Quadrifoglio
Vehicle Mechanical Warranty: 5 years / 150 000KM
Service Plan: 6 years / 105 000KM
Year: 2011
Power: 173kW / 232Bhp

Hello world!

Welcome to my refreshed zuluCoda blog.

A lot has happened since my last post. I have been busy with various things from switching over to new tech stack, discovering some new coding workflow techniques.

I’m going to cover some car stuff particular Alfa Romeo since I am an Alfisti (Alfa fan).

So stay tuned!

Hard Work Overrides Talent

“hard work overrides talent” Curtis 50 Cent Jackson quote to Kendrick Lamar

I also relate to this a lot because I wouldn’t say that I was super talented growing up. I was fortunate enough to be surrounded by talented people, especially at Parktown Boys’ High School. I was blessed to have so many friends from different backgrounds.

It was amazing to watch my talented friends do their thing, in sports, academic, drama and other activities. Their passion rubbed onto me, so I became passionate.

I found my niche in computer programming, and I still remember the first time I saw a programming language. I had just started High School at Parktown Boys’ High (Best boys’ school in the world). One of my seniors whose nickname was snakey (because of His small frame) was at the computer centre working on His computer science homework. The screen was blue, and the text on the screen was yellow, and I remember seeing it and being so amazed by what I saw on the screen. I didn’t know what I was looking at at the time, but I liked what I was seeing. So I asked Andrew (Snakey) what is that? And He told me this is a programming language called PASCAL. I told Him I want to do this as well. He then said that I must work hard to understand programming basics because once I know the building blocks of programming and have a solid foundation, I’ll code anything. So my journey began.

In 2005 I started my professional software development career at a small IT company called amaDigital. There I was given the opportunity to work with clients and build entire web applications. Fast forward many years later, and I am now a Tech Lead working at a large corporate. As I said at the beginning of this blog post I’m not the most talented person, what I have is the ability to visualise what I want, and I put in the hard work necessary to make it happen.

Being a programmer is incredible. There’s so many cool tools & techniques being created by excellent programmers. I believe it’s my responsibility to use these tools & techniques to develop applications that will somehow contribute to society. It would be great to be known as “that zuluCoda guy” who created a fantastic web app that revolutionised how people do business in Africa. And When they ask me, How I did it? I’ll say Hard Work and self-belief.